Our final step in completing our kitchen renovation was to finish our kitchen island. At first I want to use stone around the island but decided not to because of the large price tag that came with it. I decided to go with a two toned traditional style island that had a wainscoting and a bead board in the middle. I am SO mad at myself though because I was so excited to get started on the island that I completely spaced the before picture! All the island was was some unfinished MDF board on the three sides and then my cabinets on the back of the island. Here is the best before picture I could find of the island. This was a little family birthday we threw Jaysa when she turned three.
Got to love all Jaysa's Goofy faces!
Here is one more I found of the side of it
To begin with the island I found three of these stair case posts at the Restore for $9 dollars a piece. The Restore is basically a Good Will for building materials. There is most likely one in your area!
A friend gave me the idea of turning the posts upside down to use them as pillars on my island. I loved the idea so I bought them.
Here are some posts that are really similar to the ones I bought at the Restore. These are actually a little thinner than mine but if I had bought 3 posts new at the store they would have cost me around $90 dollars instead of the $30 I spent at the Restore!
After bringing them home we cut them to the right size so they would fit snug under my island. You want them really snug so that you can hammer them in with a rubber mallet and not need to use glue to adhere them. The posts were a little lighter than I wanted them so I sanded them down and restained them a darker color. 150 grit sand paper is what I have found to be the best when sanding off a finish. I sanded
and sanded
and sanded
It took me FOREVER but I was still happy to be saving $60 dollars.
If you are using stair case posts chances are there will be small holes where they were attached to the banister of the staircase. Fill those holes with wood filler and sand them down to make sure they are even and ready for staining.
After that we headed to Home Depot to get everything else we needed to complete the island.
We bought a 1/4 inch think wood board that was stainable and had it cut right there in the store.
Then we bought a wainscotting bead board that is assembled a lot like wood floring. The pieces click into each other. To be honest I wasn't the biggest fan of this stuff. I felt like it was a little bit cheap. It chipped easily and I had to touch up the ends and seal it really good with my final gloss coat.
These were $12.27 per box. The price tag was perfect but you definately got what you paid for. In the end after painting and getting a protective coat on them I think they will hold up just fine.
We bought some trim to frame the beadboard. Our trim was .92 cents per ft.
We also bought some roped wood trim that would help tie in the island with my cabinets. These were 8 ft. long at $12.22 a piece so we spent a little over $50 on 4 pieces of roped wood trim.

When we got home with our supplies I started preping the wood for stain and paint. First I sanded my 1/4 inch board with a really fine 400 grit sand paper. I did this because my board felt like it had some splintery fuzzies on it. I know thats a bit of an oxymoron but thats exactly what it felt like. It felt like the board had the smallest thinest splinters on it that were not strong enough to poke you. I didn't want to take a chance on geting splinters so I sanded it down and the fuzzies came right off.
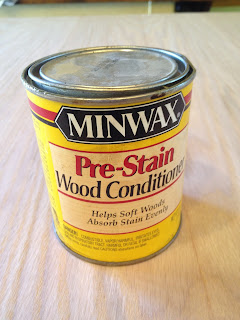
I wanted my 1/4 inch board satined so I used a wood conditioner I found at a garage sale for .25 cents to prep the wood. To be really honest If I had not have found this at a garage sale for so cheap I would have skipped this step. But since I have it I might as well use it!.
After letting that dry I applied my stain with a pair of latex gloves. (I paid $1.50 for a box of latex gloves at a garage sale, which makes staining so much easier!) I used an English oak stain that was a medium brown. My 1/4 inch board was not the same type of wood as trim pieces so to get my colors to match a little better I ran out and got a dark walnut stain, which is just one shade darker and gave my board a few coats of that to help darken it up.
I also stained my corner pieces
my rope trim,
and my staircase post/kitchen pillars.
Then I went on to painting my bead board and trim. My bead board came out of the package white. I wanted it to match everything else so I painted them the same cream color I used on the cabinets.
I also gave my trim a few coats of the same paint. These are the saw horses I bought from a garage sale a few weeks ago for $2.50 a piece. They have already been a major help with projects.
After my bead board and trim were primed and painted I glazed them to give it that distressed look I was going for on my cabinets.
Here is what my bead board looked like after being glazed.
After everything was stained or primed and painted it needed a final protctive coat. For the bead board and trim I used a Valspar Clear Protector.
When I did my cabinets I did not want them to have a high gloss sheen to them so a Lowes employee told me about a clear protector which would give it more of a matte finish.
For the wood rope trim pieces I used a polyurathane I bought at the Restore for $5 dollars.
Because Home Depot could not cut the divets where the cabinets receed and met the kick board. C.J. had to cut our board to make it fit perfectly. He used a perminate marker to draw a line on the back and cut it out with a little hand held saw. He then filed down all the left over shaving on the sides.
After all our wood was stained and painted we were ready to nail everything on. C.J. nailed our 1/4 inch board to the island first.
Then the corner piece for the two front edges of the island where nailed on to finish off the corners where our boards met.
I waited to polyurathane the 1/4 inch boards until they were nailed on so I went back and polyeurathaned them and waited for them to dry. Then we centered the bead board and marked where it needed to be so we could ensure it would stay centered when we started nailing.
Then C.J. cut the trim for all three sides and framed out the bead board.
Then we started adding our roped wood trim to the outside edges on each side of the island. After that we put our pillars on. C.J. made sure to be very excact when cutting these pillars. They can be slide under the bottom of the granite at a slight angle and then hammered with a rubber mallet into place by gently hitting the bottom of the post. If you wanted to attach them with some sort of glue that would be possible. You would just have to wipe away the streak of glue that will form from hammering it over with a rubber mallet.
For the final touch I added a wood scroll to the front of the island. After being primed, painted, glazed and glossed with the same protective coat I using on the bead board and trim I put a thin layer of wood glue on the back of my wood scroll.
We placed the wood scroll in the center of the front of the island and then inconspicuously put a few nails in it to make sure it would not slide down after being glued. We spent a total of about $150 on the island and a total of about $700 dollars on the entire renovation! (Not including the chandelier because we actually had it before we moved in)
We went from this MDF board kitchen island


0 comments:
Post a Comment